两点之间直线最短,故图中 R1 如果与 R4 通信,只通过 R2 路由是最快的。但今天我们任性下,让数据包经过 R3 路由器,再发往 R4。
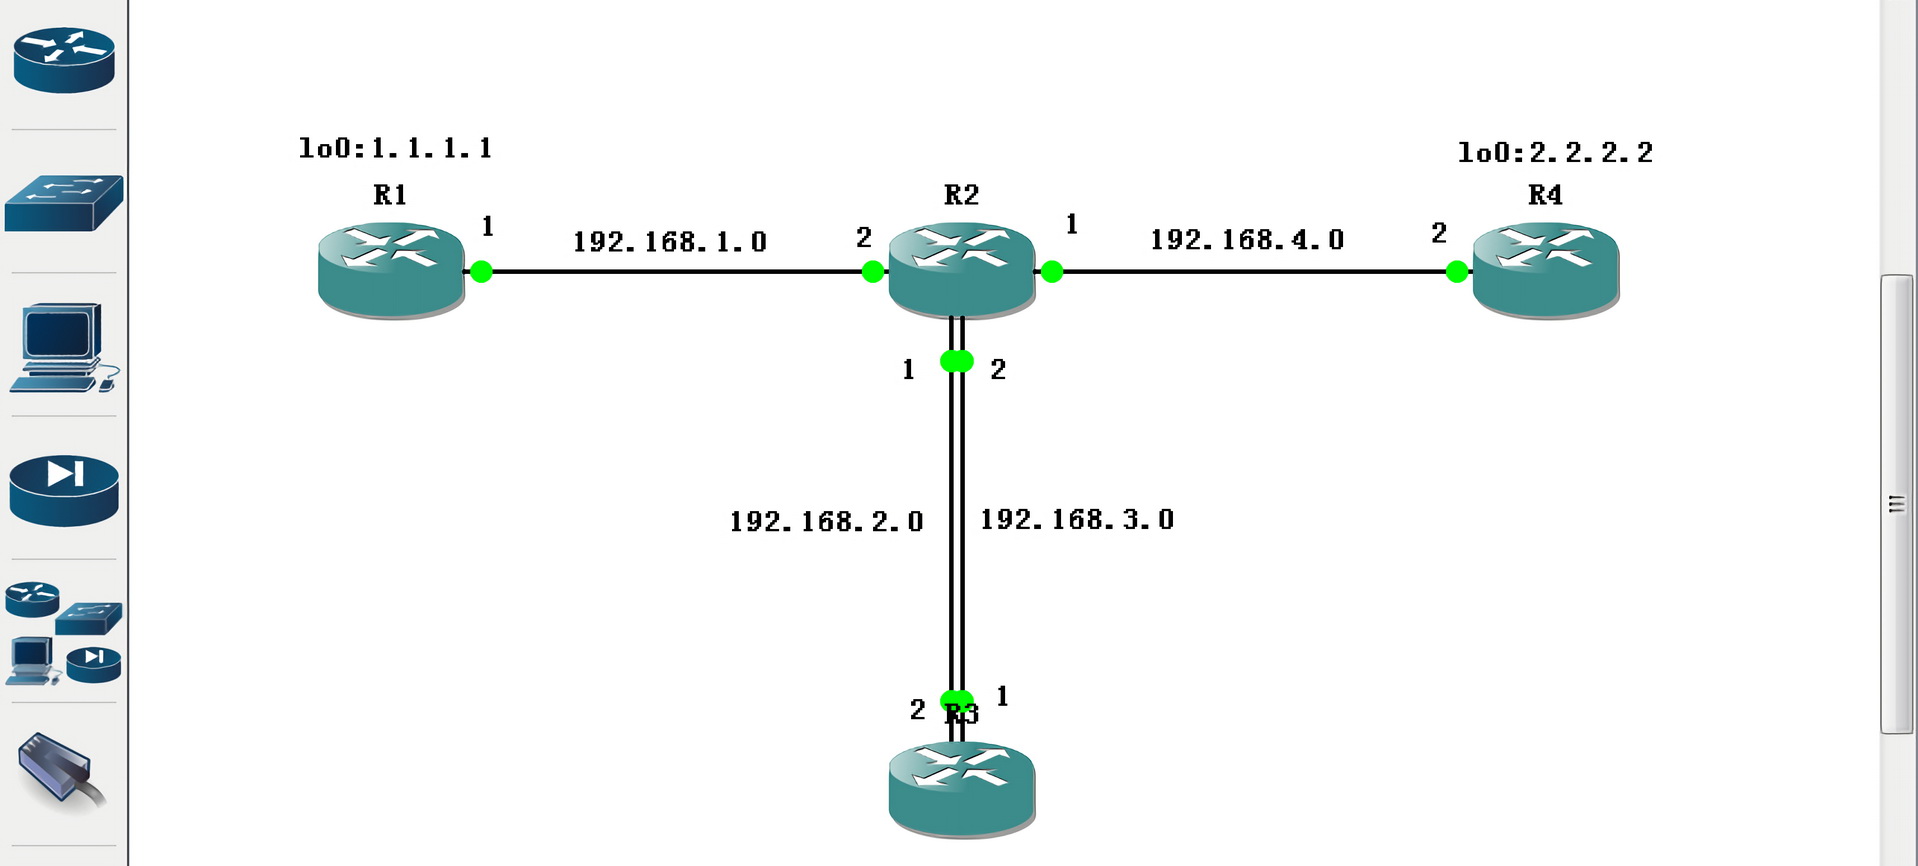
实验拓扑
实验拓扑如图:
数据走向
我们需要数据包的发送走向:
- 192.168.1.2
- 192.168.2.2
- 192.168.3.2
- 192.168.4.2
我们需要数据包的接受走向:
- 192.168.3.1
- 192.168.1.1
操作命令
1 | R4#configure terminal |
注意:首先我们需要配置基础网络环境,实现全网连通。「仅以 R4 路由器为例」配置如上。
连通测试
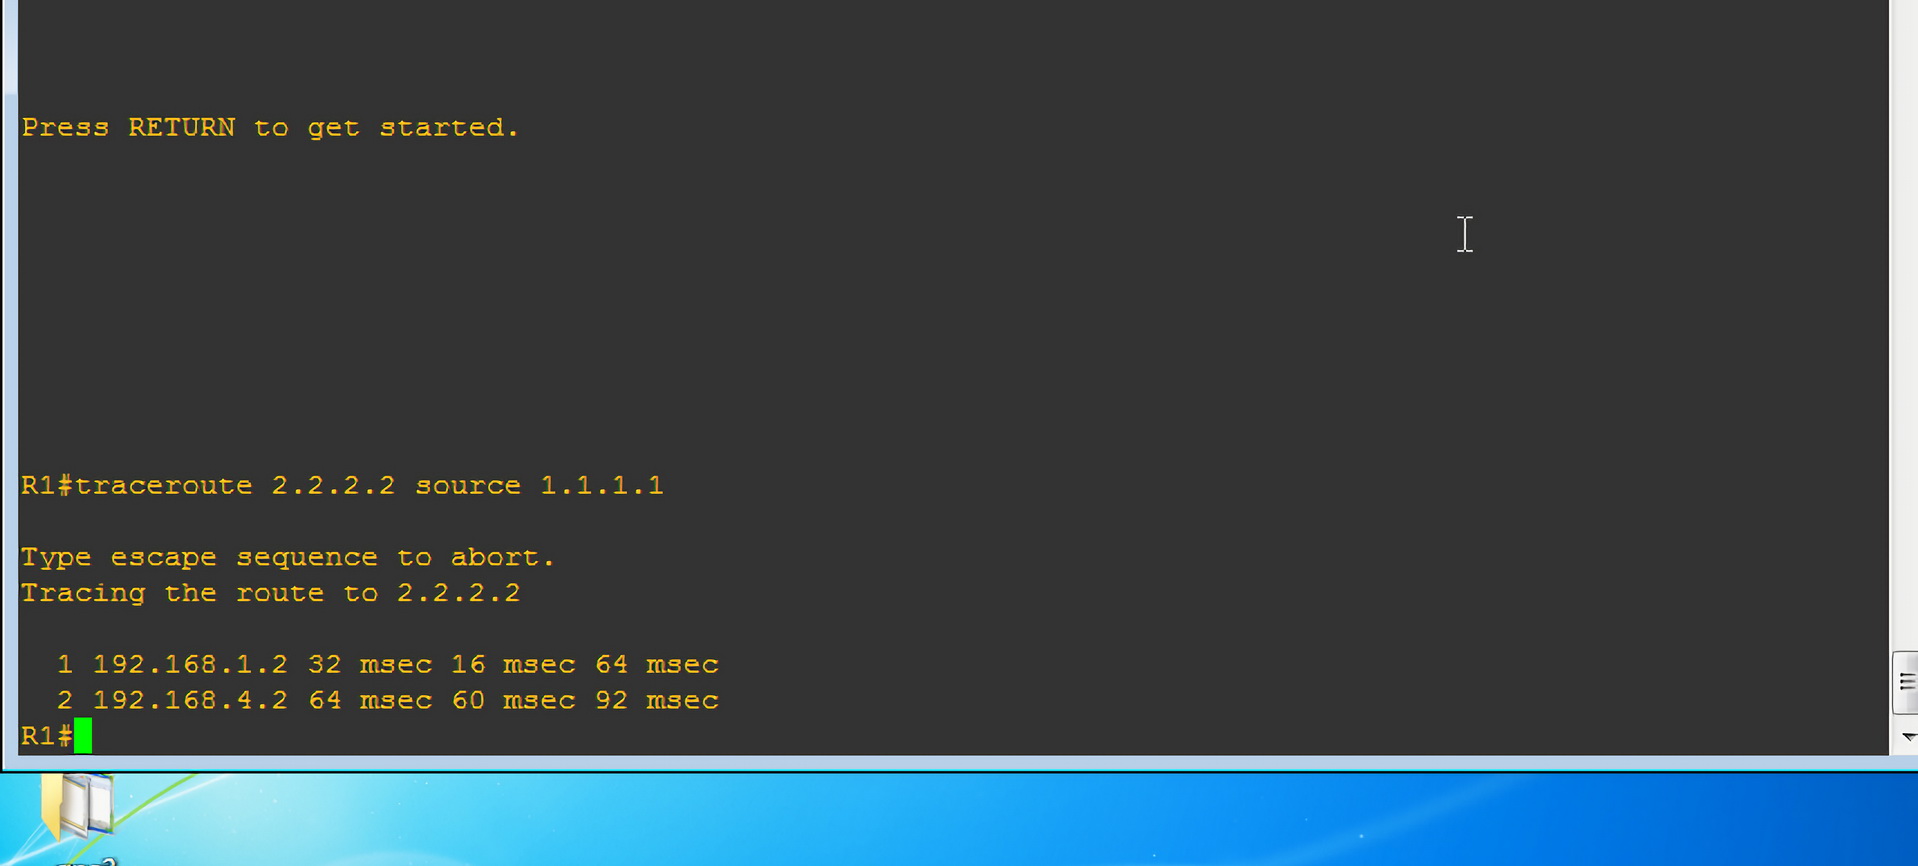
然后我们测试一下网络的连通性,通过 traceroute 命令可以看得出,路由先通过 192.168.1.2,然后是 192.168.4.2:
修改走向
1 | R2(config)#access-list 100 permit ip host 1.1.1.1 host 2.2.2.2 |
注意:接下来我们修改一下数据包走向。通过拓扑我们可以判断,数据包在 R2 路由器需要转变方向,发送给 R3,所以我们在 R2 路由进行如上配置。
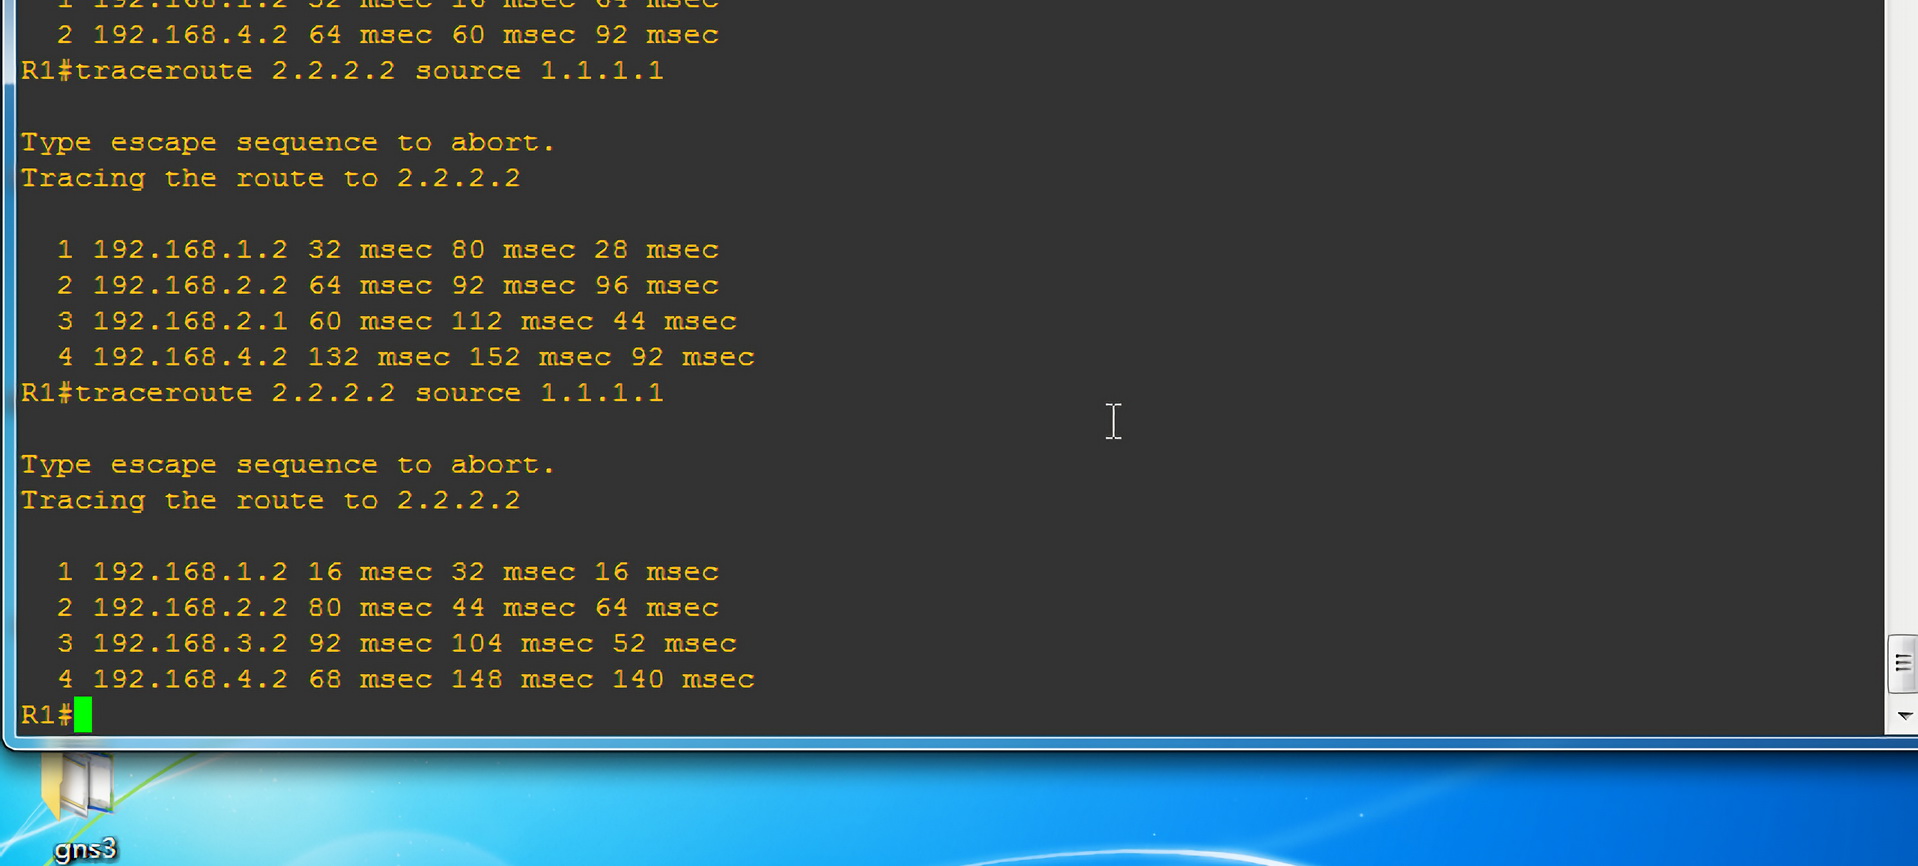
测试走向
看下数据包的走向,可以看出,数据包发向 R2,但是路线并不是期望的那样,第三路线并不是 192.168.3.2:
变更走向
R3(config)#access-list 100 permit ip host 1.1.1.1 host 2.2.2.2
R3(config)#route-map p2 permit 10
R3(config-route-map)#match ip address 100
R3(config-route-map)#set ip next-hop 192.168.3.2
R3(config-route-map)#exit
R3(config)#interface fastEthernet 0/0
R3(config-if)#ip policy route-map p2
注意:我们需要在 R3 配置。
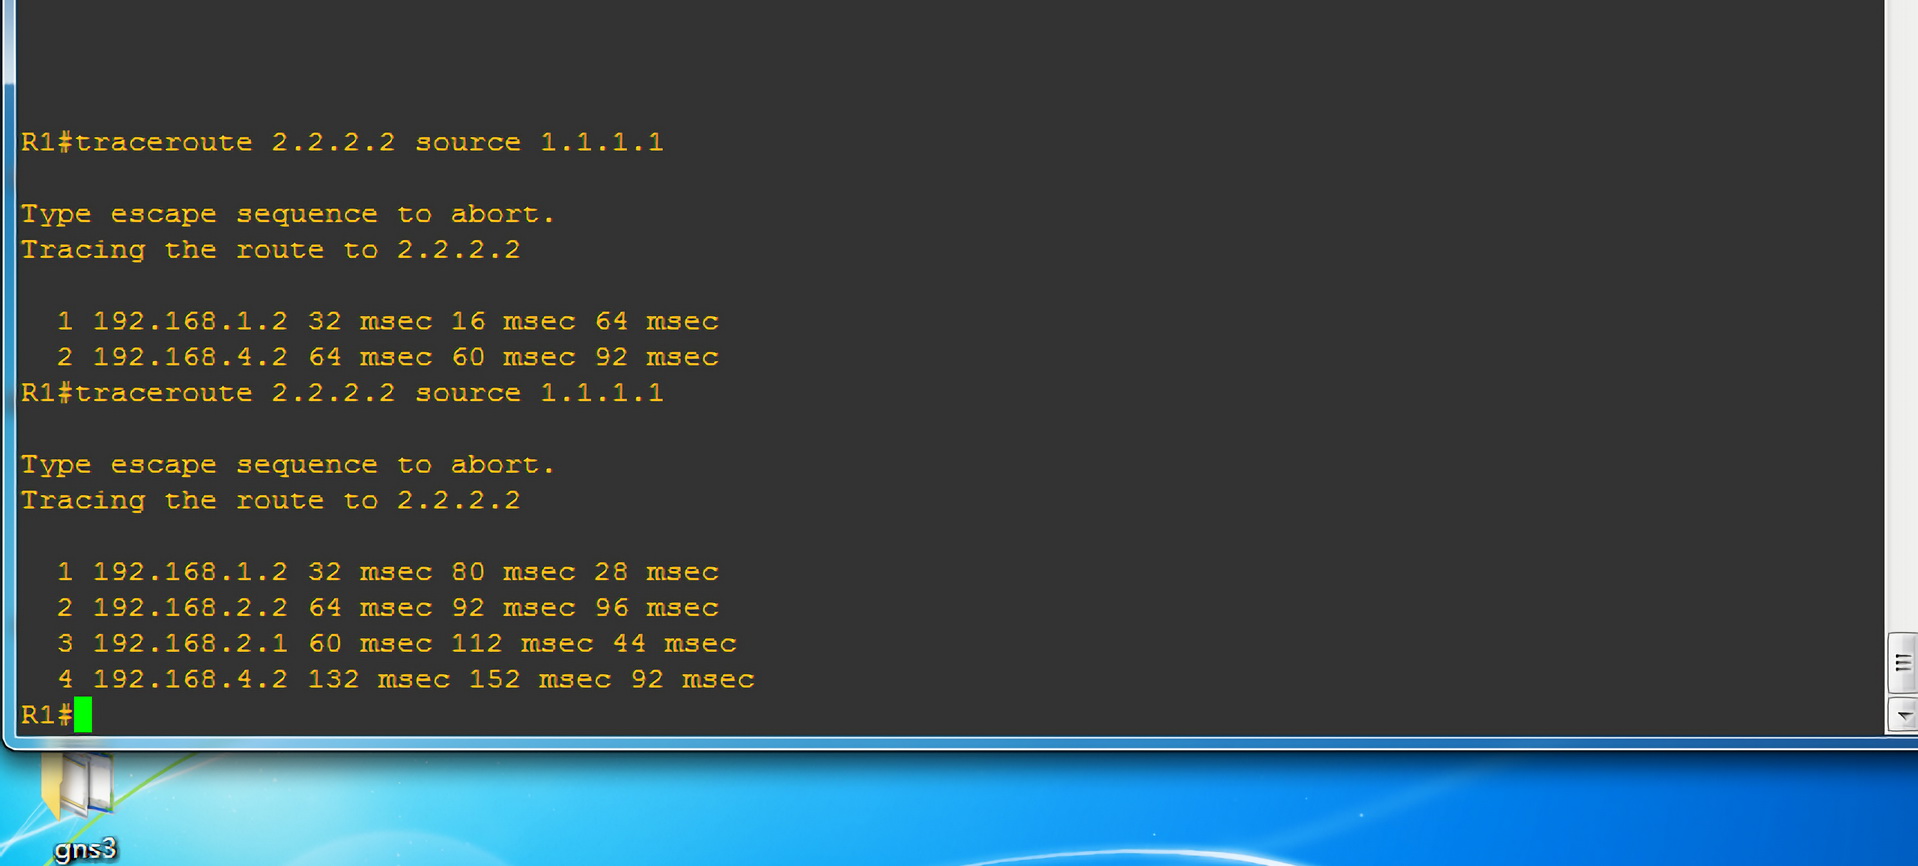
变更测试
再次查看一下数据包的走向: