首先完成准备工作,然后开始安装 DHCP/TFTP 服务端,接着提供 BootLoader 及配置文件,挂着光盘把内核文件 cp 到 TFTP 目录,部署 httpd 服务端提供文件服务,设置菜单及提供系统安装软件等。
架构流程
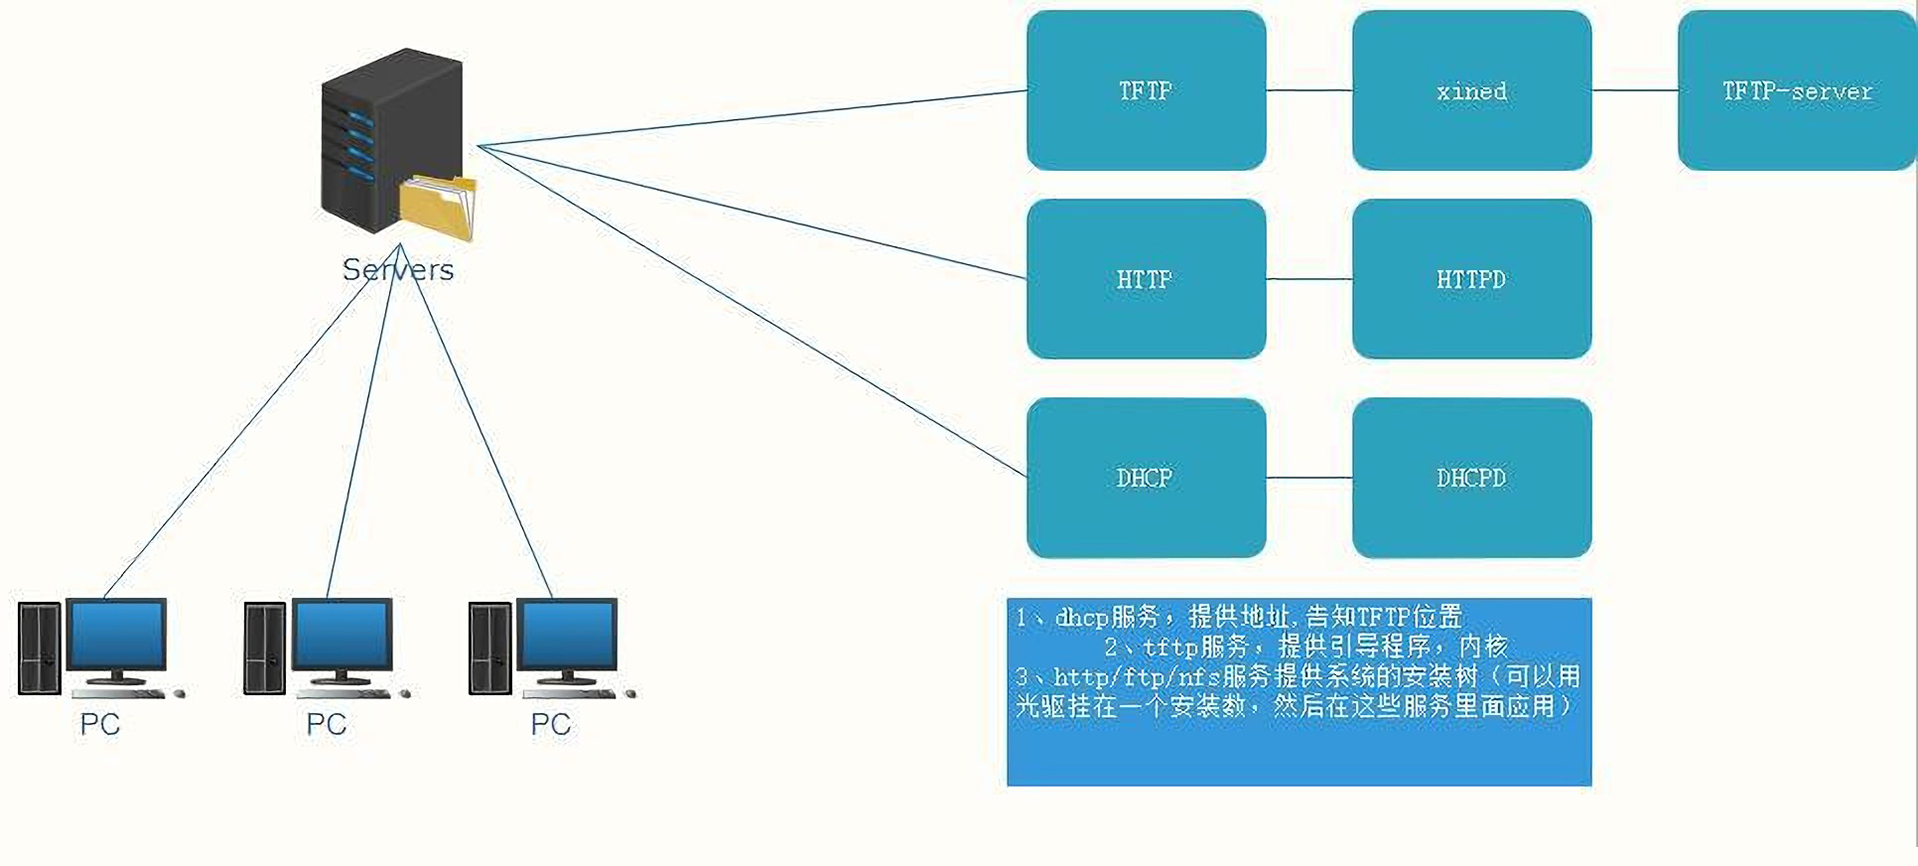
实战案例架构图示如下:
流程图示如下:
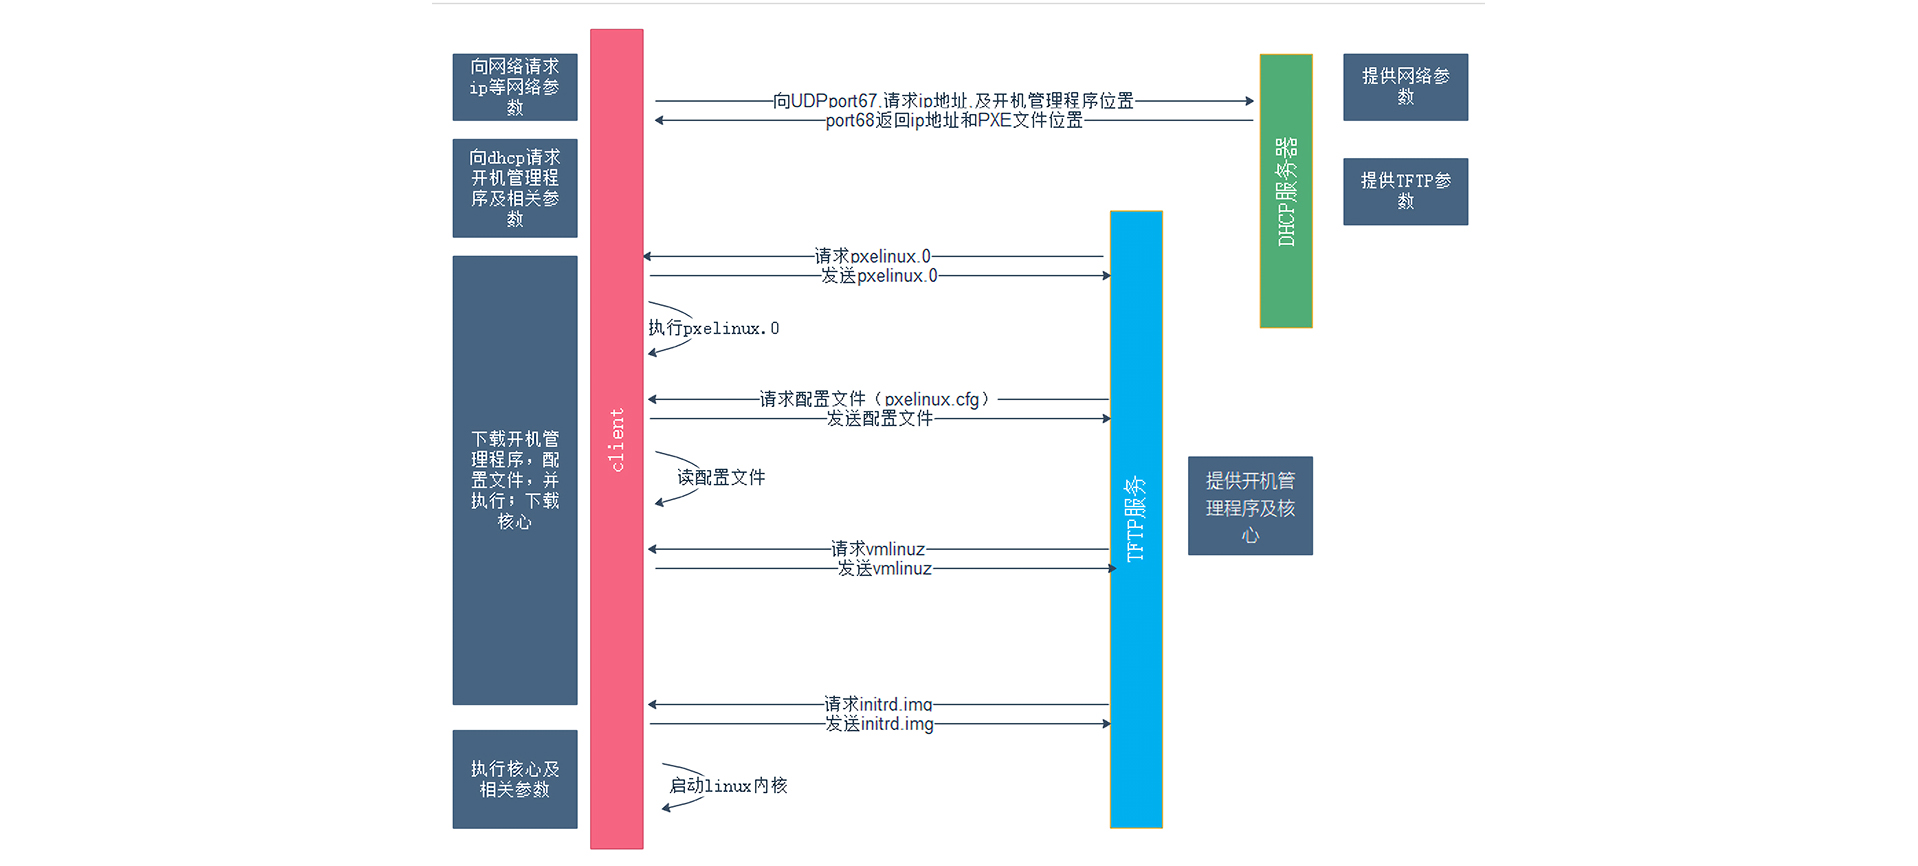
流程解读
客户端向 PXE 服务器上的 DHCP 发送 IP 地址请求消息,DHCP 检测客户端是否合法,同时将 PXE 环境下的 BootLoader 文件 pxelinux.0 的位置信息发给客户端;
客户端向 PXE 服务器上的 TFTP 请求 pxelinux.0,TFTP 收到消息向客户端发送 pxelinux.0 大小信息,同时等待确认信息,当 TFTP 收到客户端发回的统一大小信息后发送 pxelinux.0;
客户端执行接收到的 pxelinux.0;
客户端向 TFTP 请求 pxelinux.cfg 文件「其实它是目录,里面放了启动菜单,即 GRUB 配置文件」TFTP 会将配置文件发回客户端,继而客户端根据配置文件执行后续的操作;
客户端向 TFTP 发送 Linux 内核请求信息,TFTP 发送 Kernel;
客户端向 TFTP 发送根文件请求信息,TFTP 接受到消息之后返回 Linux 根文件系统;
客户端加载 Linux 内核;
客户端通过 NFS/FTP/HTTP 下载系统安装文件进行安装,如果配置文件指定了 Kickstart 路径,则根据此文件自动应答安装系统。
准备工作
1 | systemctl stop firewalld |
注意:以上分别是关闭防火墙和 SELinux。
安装软件
1 | yum -y install dhcp httpd syslinux tftp-server xinetd |
注意:安装相关工具。
部署 DHCP 服务端
修改 DHCP 配置文件/etc/dhcp/dhcpd.conf:
1 | subnet 192.168.1.0 netmask 255.255.255.0 { |
启动服务:
1 | systemctl start dhcpd |
部署 TFTP 服务端
从流程得知 BootLoader 文件 pxelinux.0 以及内核相关的配置文件「目录 pxelinux.cfg 下」主要都是由 TFTP 来提供的:
1 | sed -i '/disable/s/no/yes/g' /etc/xinetd.d/tftp |
TFTP 是由 xinetd 所管理的,因此设定好 TFTP 之后,要启动的是 xinetd:
1 | systemctl start tftp xinetd |
提供 BootLoader 机配置文件
1 | cp /usr/share/syslinux/{menu.c32,pxelinux.0} /var/lib/tftpboot |
注意:menu.c32 图形化菜单,pxelinux.0 是 BootLoader 机,pxelinux.cfg 是开机菜单设定。
部署 HTTP 服务端
挂载光盘:
1 | mkdir /var/www/html/centos |
启动服务:
1 | systemctl start httpd |
设置菜单
拷贝内核文件:
1 | mkdir /var/lib/tftpboot/pxelinux.cfg |
通过 vim 新建引导启动菜单/var/lib/tftpboot/pxelinux.cfg/default:
1 | default vesamenu.c32 |
实现无人值守批量安装
1 | #platform=x86, AMD64, 或 Intel EM64T |
注意:将上述内容写入/var/www/html/ks.cfg。


条评论