本博客的模板是 Volantis,开发者们非常勤劳,经常更新些新玩意。每次收到更新通知时杜老师都会第一时间同步代码,不过还要登录服务器部署才可以生效。本文分享如何配置接收 GitHub Webhook 后自动执行脚本。
工具下载
下载地址:
下载地址解压配置
下载后可先本地解压再传到服务器上的/opt 目录,或在服务器运行 unzip linux-webhook.zip。如提示 command not found,请执行下面的命令:
1 | yum -y install unzip # CentOS |
然后编写服务配置文件,将下面代码写入/lib/systemd/system/webhook.service,其中的 SECRET 可自定义:
1 | [Unit] |
编写脚本
将需执行的脚本写入/opt/github.sh,例如:
1 | #!/bin/bash |
脚本末尾一定要加入 exit 0。最后赋予文件执行权限:
1 | chmod +x /opt/linux-webhook |
服务相关命令:
1 | systemctl daemon-reload # 重载配置 |
服务默认端口为 2020,更换请将 ExecStart 项改为:
1 | ExecStart=/opt/linux-webhook --port PORT --bash /opt/github.sh --secret SECRET |
其它配置
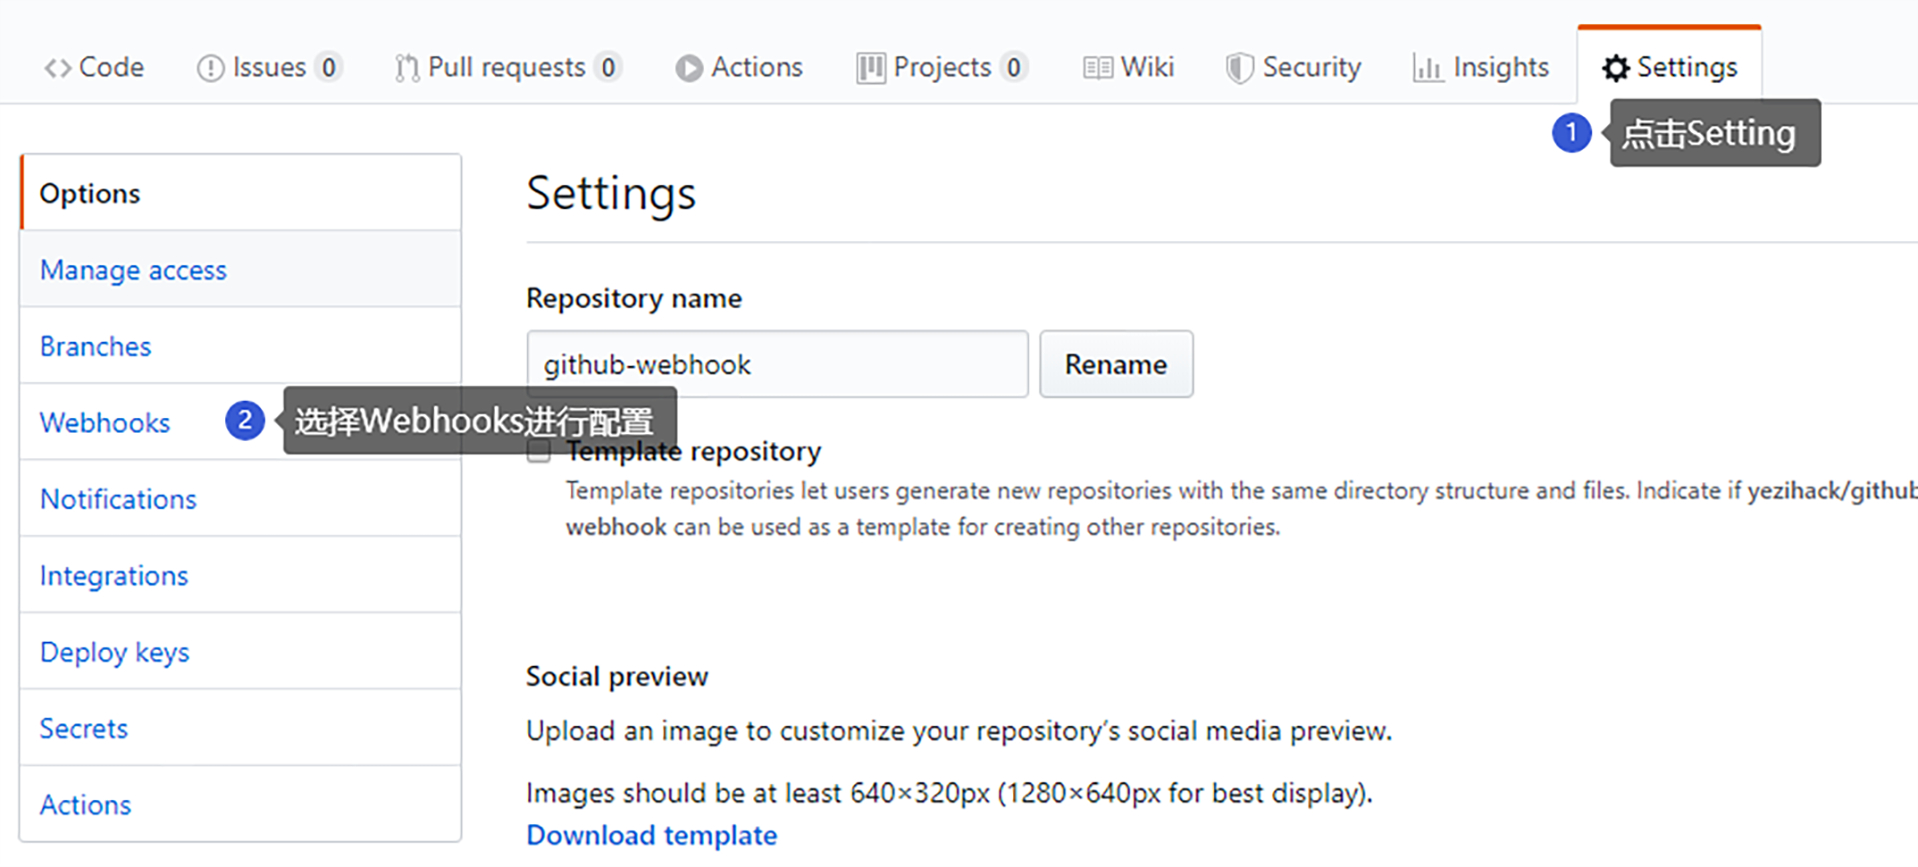
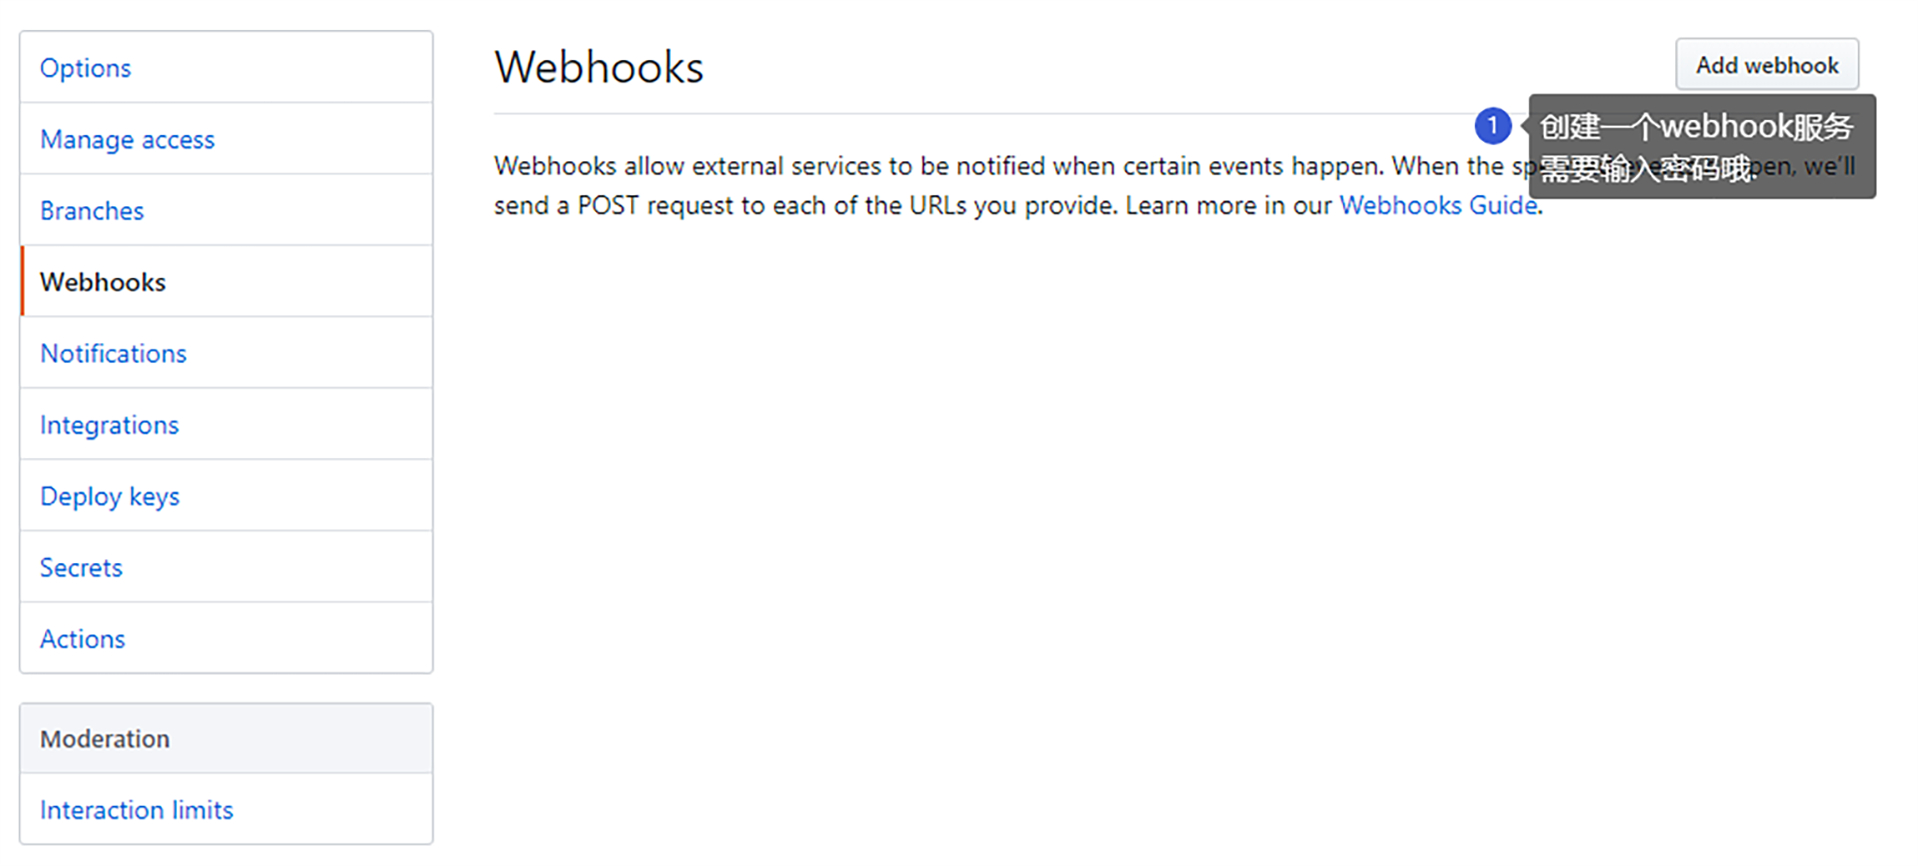
Settings->Webhooks:
Add webhook:
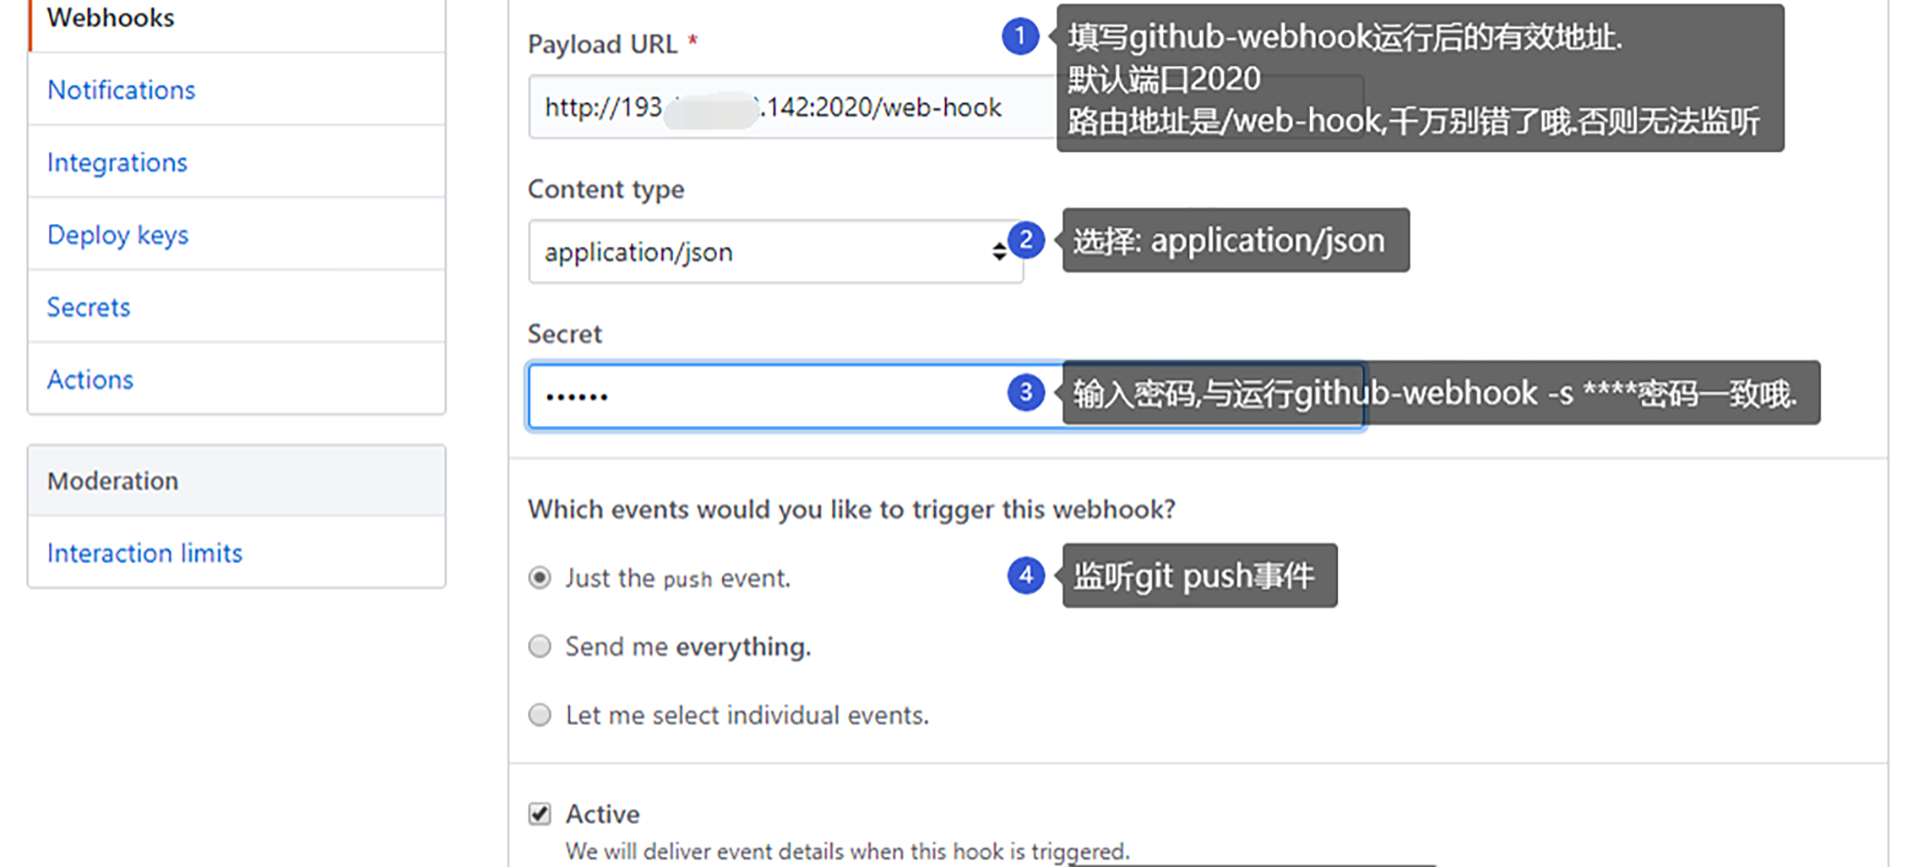
Payload URL 填写 http://IP:PORT/web-hook,Content type 选择 application/json,Secret 填写之前设置的,最后点击 Add webhook 就行了:
Recent Deliveries 会显示回调状态,绿色对勾即为成功:
